 Back to the Computer Zoo
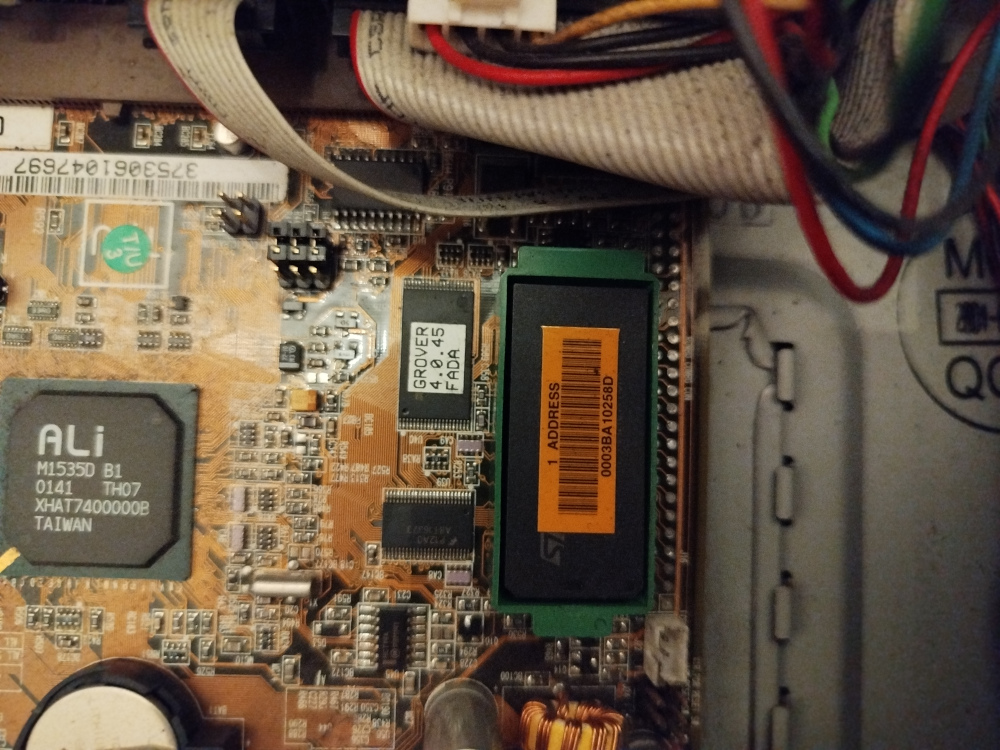
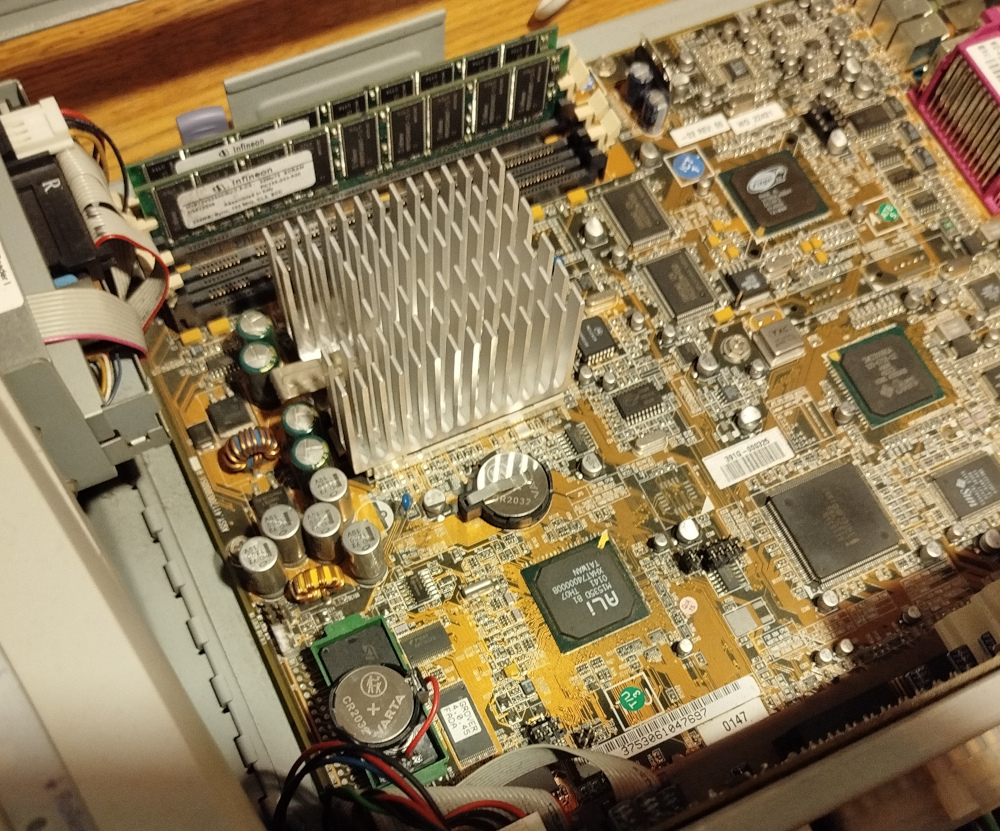
In the picture above, we can see the bulky NVRAM chip on the main board, there is a yellow sticker with the MAC address on top. The chip sits in a green plastic holder with convenient handles on each end to pull it out.
In the bottom left of the picture you can see a socketed CR2032. Looking around the web for information on how to restore the NVRAM contents, I found a website that claimed that on the Sun Blade 100, you only need to replace this socketed battery. This turned out to be wrong.
The MAC address of my machien happens to be 00:03:BA:10:25:8D, with the vendor ID block 00:03:BA, formerly Sun Microsystems, now belongs to Oracle.
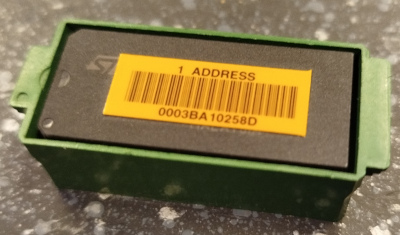
Notice the indentations on the plastic holder that line up with the similar markings on the chip itself.
The plastic case extends below the pins and is keyed at the bottom, so it can be inserted only in the correct orientation.
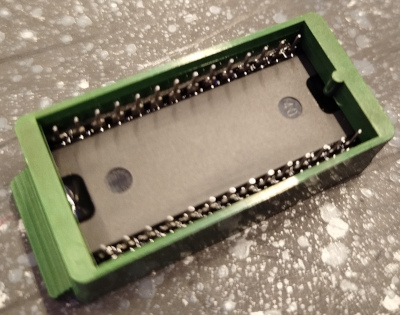
The chip itself can be inserted into the case in any orientation, so if you take it out, make abolutely sure to remember which way to put it back in.
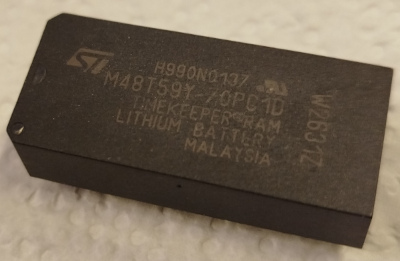
Pealing the label off, we can see that the chip itself is an M48T59Y. It has an RTC and 8k SRAM built in, powered by an internal battery, embedded in the plastic casing.
Before even touching the NVRAM chip, I tried to figure out how to restore the MAC address and ran a trial run with a soft reboot. After that, I replaced the socketed battery, tried to do the same again, then checked if the MAC is retained after pulling the power plug (it did not work). Only then I proceeded working on the NVRAM chip.
Looking around the web and digging through Usenet archives, I found several explanations on how to fumble a new MAC address into the NVRAM. They deviated from each other in some details and every one had at least some commands in it that didn't work on my machine.
The following is the sequence of steps I cobbled together from the different sources. I would like to credit MrSparc on GitHub whos instructions have been the most helpful so far.
First of all, from the OK prompt, we can dump some device tree information using the show-devs command:
ok show-devs
/SUNW,UltraSPARC-IIe@0,0
/pci@1f,0
/virtual-memory
/memory@0,0
/aliases
.......
/pci@1f,0/ebus@c/idprom
/pci@1f,0/ebus@c/eeprom@1,0
/pci@1f,0/ebus@c/flashprom@0,0
.......
I shortened the output to the interesting parts, the idprom entry on ebus@c, which (not having a bus address) is presumably an alias for the eeprom@1,0, whereas the other entry is probably the flash memory for the boot firmware.
We can check this by dumping the properties of the device node:
ok cd /pci@1f,0/ebus@c/eeprom@1,0
ok .properties
model                    mk48t59
address                  fff58000
reg                      00000001 00000000 00002000
device_type              nvram
name                     eeprom
This is our M48T59Y, it is at memory mapped at address fff58000, the MAC address and checksum are stored at offset 1fd8, i.e. starting at address fff59fd8.
The structure stored at this address has the following pseudo-C layout:
struct {
        uint8_t version;
        uint8_t machine_type;
        uint8_t mac[6];
        uint8_t date_of_manufacture[4];
        uint8_t hostid[3];
        uint8_t checksum;
};
The version is always 0x01, the machine_type is 0x83 for a Sun Blade (other machines like the Sun Ultra use 0x80 here). date_of_manufacture can be safely zero'd out.
The host ID that the firmware uses is actually four bytes, the first byte is simply the machine type, the last 3 bytes are read from this struct and usually just a repeat of the last 3 bytes of the MAC address (i.e. the host part).
The checksum is simply all the previous bytes XOR'd together. If you think about this for a second: if we set the host ID to the last 3 bytes of the MAC address, they will cancel each other out, and the zero bytes for the manufacturing date have no effect. So the only fields that contribute to the checksum are version, machine_type and the vendor ID of the MAC.
Therefore, for a Sun Blade with MAC vendor 00:03:BA, the checksum should always be 0x3B.
So lets key the data into the NVRAM at the memory offset of the struct:
ok 01 fff59fd8 c!
ok 83 fff59fd9 c!
ok 00 fff59fda c!
ok 03 fff59fdb c!
ok ba fff59fdc c!
ok 10 fff59fdd c!
ok 25 fff59fde c!
ok 8d fff59fdf c!
ok 00 fff59fe0 c!
ok 00 fff59fe1 c!
ok 00 fff59fe2 c!
ok 00 fff59fe3 c!
ok 10 fff59fe4 c!
ok 25 fff59fe5 c!
ok 8d fff59fe6 c!
ok 3b fff59fe7 c!
The c! command pops an address from the Forth stack, followed by a single byte value (a "character") that it then deposits. We push the arguments in reverse order.
I have read on some sites that you can use the .idprom or the banner commands to check if it worked, but they appear to be using cached values?
ok .idprom
Format/Type: 20 50 Ethernet: a0 0 24 a8 20 80 Date: 28 0 8 42
Serial: 28 0 4 Checksum: 0
ok banner
Sun Blade 100 (UltraSPARC-IIe), No Keyboard
OpenBoot 4.0, 512 MB memory installed, Serial #1344798724.
Ethernet address a0:0:24:a8:20:80, Host ID: 50280004.


The IDPROM contents are invalid
Resetting the machine apparently causes the firmware to read the fresh contents back from the SRAM and it accepts the checksum:
ok reset-all
Resetting ...
We no longer get an OK prompt, the firmware is happy with the NVRAM contents and immediately tries to network boot.
We can get back into the OK prompt by pressing STOP+A, or on the serial by sending a BREAK.
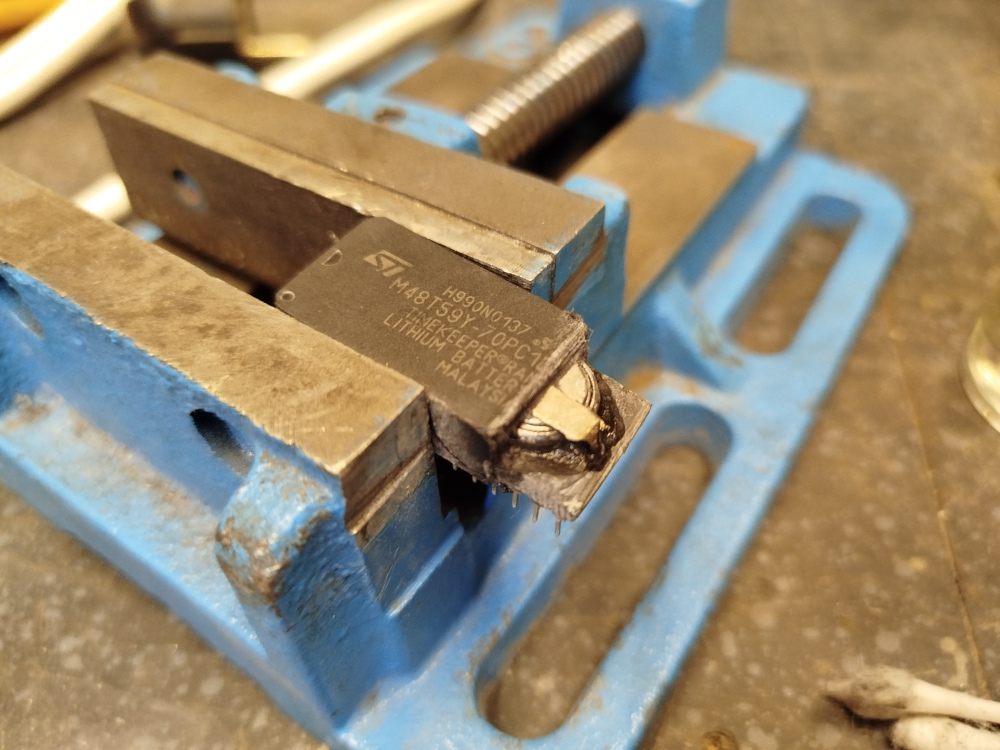
Restraining the NVRAM in a vice and grinding away on the plastic reveals the battery. I first started off with a file, once I saw a glimpse of the battery and was sure that I was digging on the right end, continued with a Dremel.
In the photo above, note the ST logo and the two indents on the left of the chip. The battery is burried on the bottom end.
The ground terminal is at the top of the battery that is separated by an isolting ring from the rest of the case. The rest of the battery case provides the postivie terminal, both are connected to two wires at the bottom of the chip.
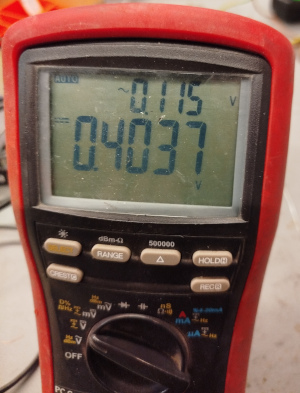
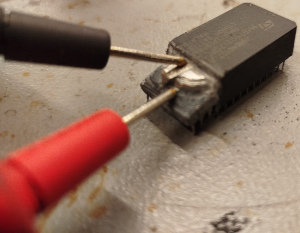
He's dead Jim...
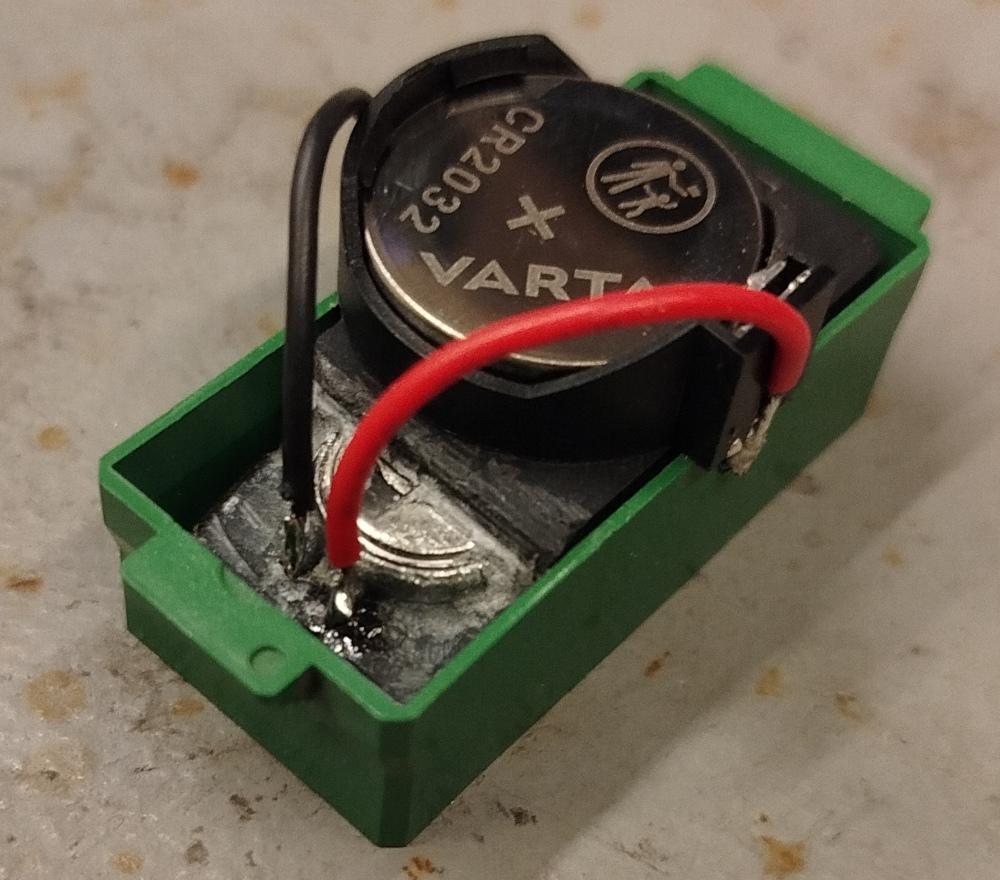
I left the old battery in place, simply ripped the top terminal off and connected two wires to a CR2032 holder. I thought about glueing it on, but a quick test with the green plastic case shows that it fits snuggly onto it.
A pictogram on the battery instructs us to keep trolling children and short people.
Notice the markings on the green plastic. While quickly testing the mechanical setup, I accidentally put the chip in the wrong way. I only noticed this later on when comparing the orientation with the photos from before taking it out, hence my remark above about making absolutely sure.
Plugging the chip back into the main board, the right way around.
After the operation was done, I powered the machine on. Fans whirring, LEDs lighting up and… the screen stayed dark, no beep.
I got really worried at this point, panically ripped out the power cord, double and tripple checked the orientation of the chip, checked if there was maybe a metal piece caught up somewhere, creating a short.
After several tries, I had the idea to check if there is something on the serial that might be helpful.
Turns out, the boot firmware had decided to run an extensive diagnostic and memory check. For maximum suspense, it decided not to turn on the screen or give some sort of beep code to inform us.
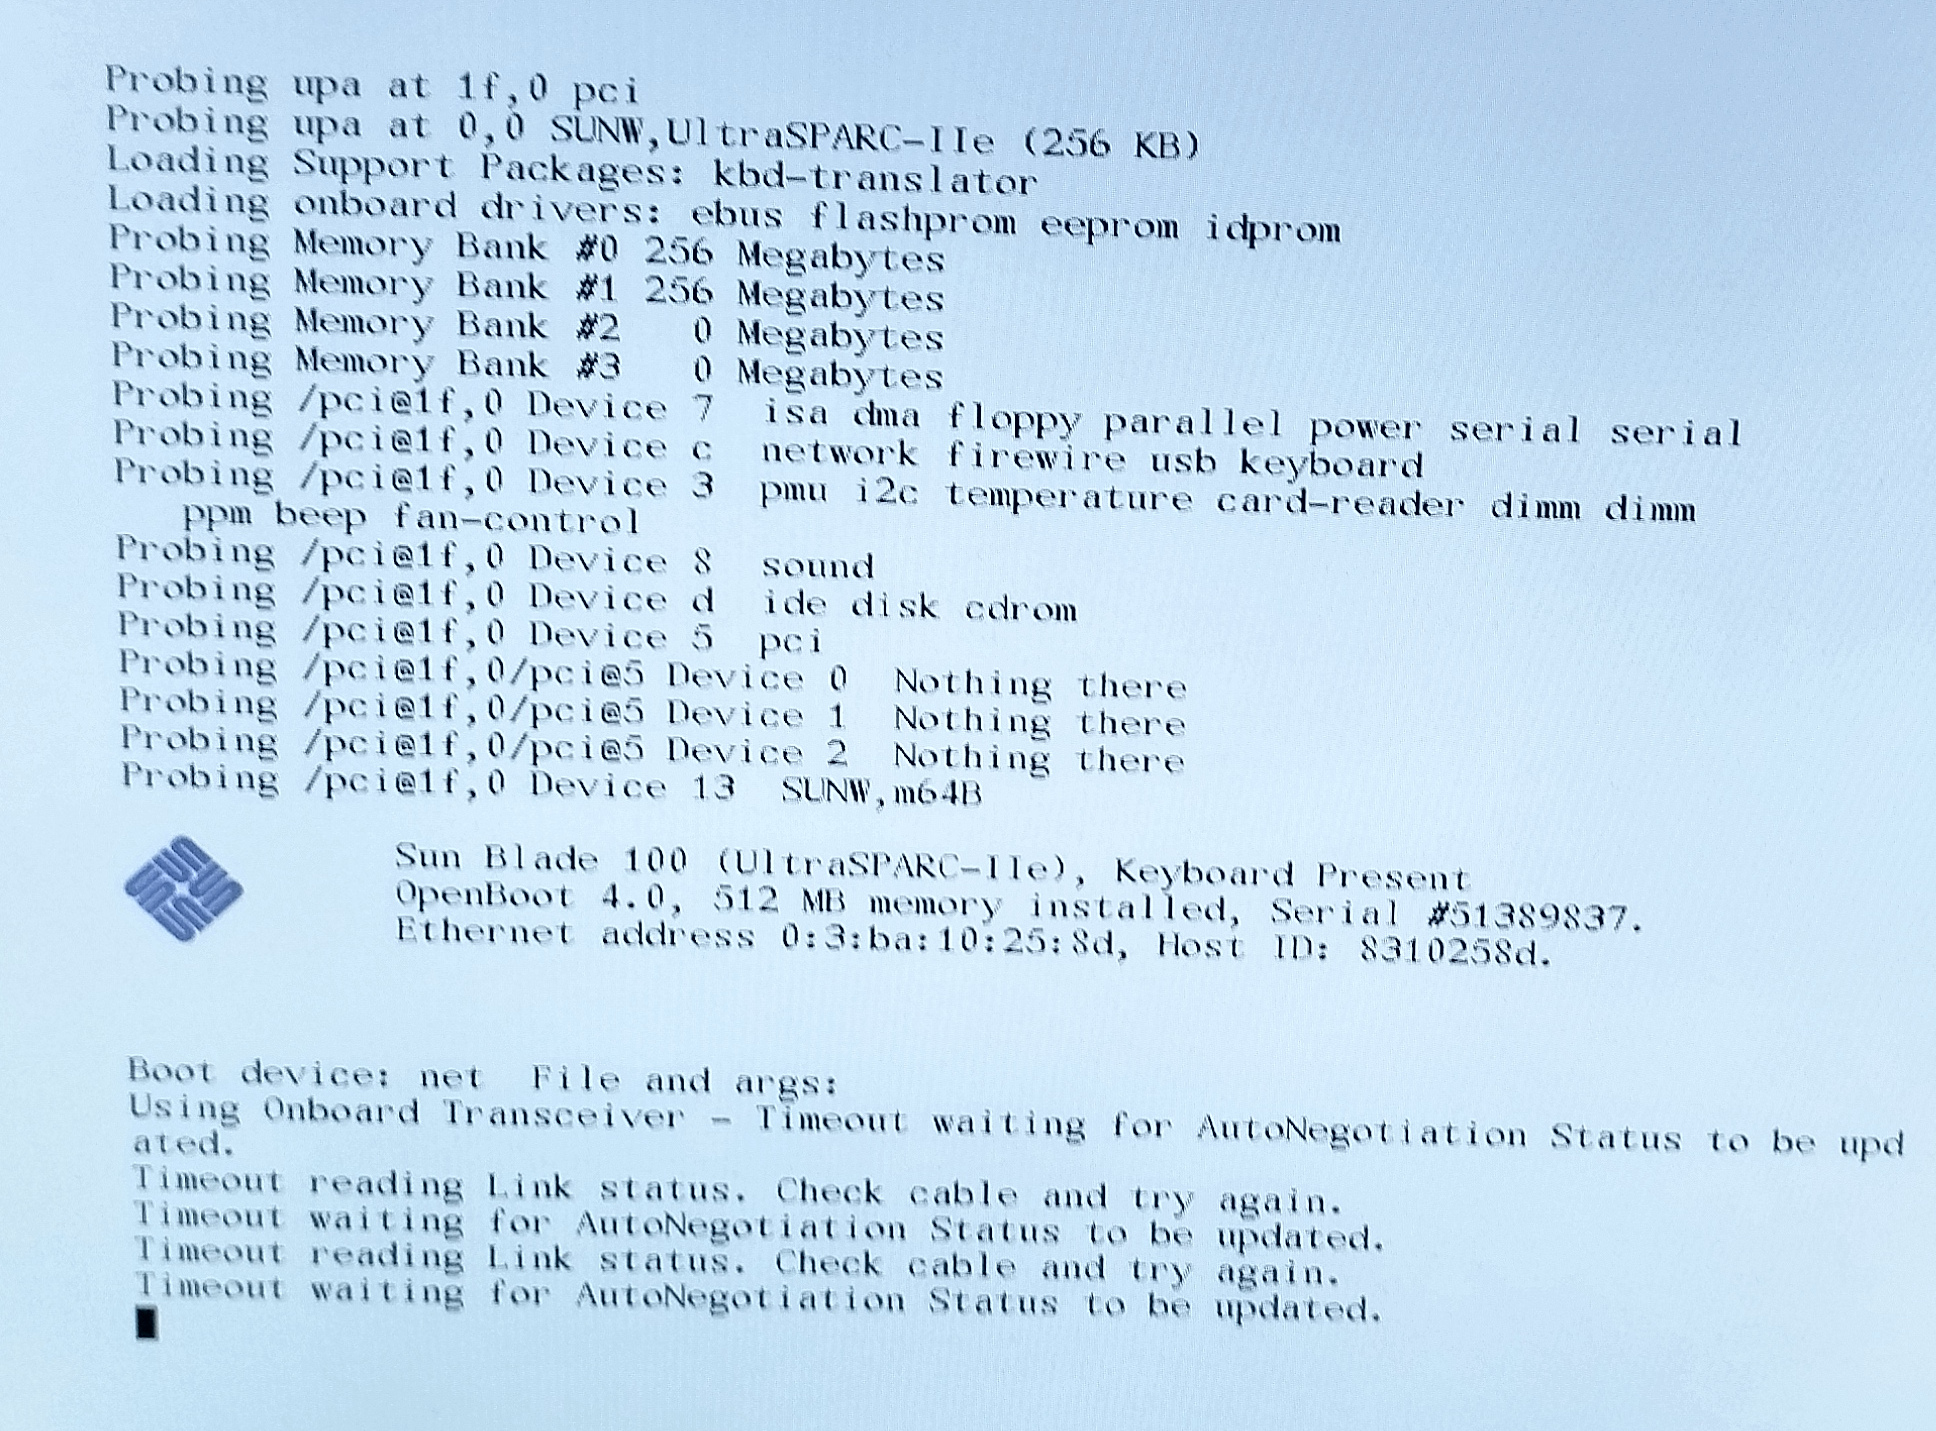
After a solid 5 minutes of diagnostics scrolling past, I finally got a beep from the speaker and an OK prompt on the serial. I went through the MAC address settings again. This is actually where the non-screen-photo captures above are from.
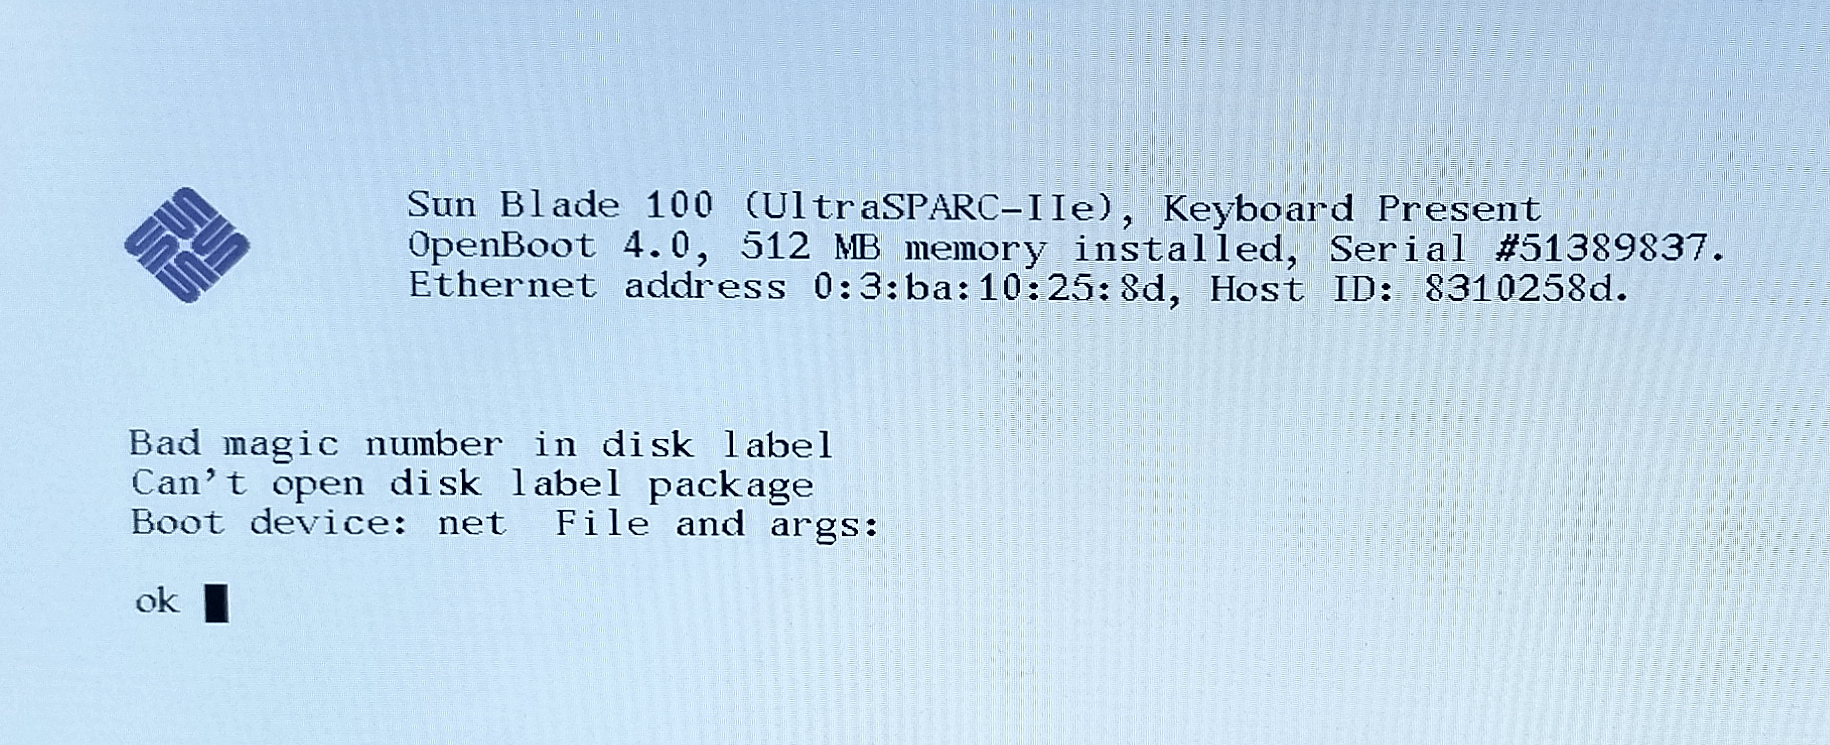
This picture shows what I got after the whole battery replacing and NVRAM restore process. It even remembered the MAC address and host ID after being unplugged over night.
Notice that the difference from the screen-photo above, there is no dump of stuff being probed, just the banner. Instead of automagic network boot, the machine now tries (unsuccessfully) to boot from the disk.
Digging through manuals (and serial console backlog), it turns out that this is because the diag-switch? NVRAM variable is now set to false. The boot firmware automatically sets it to true if the checksum is invalid, causing the probe log. I have previously only tried warm reboots after setting the MAC, so I guess it the automatically set variable stayed in the SRAM? According to the manual, if the variable is set and the checksum is correct, the machine attempts a network boot by default.
After the last re-initialization and resetting to defaults, it is now off and remained off. No fancy diagnostics and auto-boot defaults to trying the disk first.
 Back to top Back to top
|
| |
Back to the Computer Zoo
|